Controller Deadzone Explained for Stick Drift
One tiny stick movement can mean the difference between a perfect shot and a total miss. Controller deadzone explanation breaks down the hidden setting that quietly controls how sensitive your controller really is—and why adjusting it can instantly improve how games feel.
“If My Stick Is Moving, Why Doesn’t Anything Happen in Game?”
This question comes up right after people use an online tester.
They see:
- Axis values like 0.01 or 0.02
- Slight movement when they’re not touching the stick
But in-game:
- The character doesn’t move
- The camera stays still
From experience, this leads to confusion:
“Is the game broken — or is the tester wrong?”
The answer is neither.
You’re seeing deadzones at work.
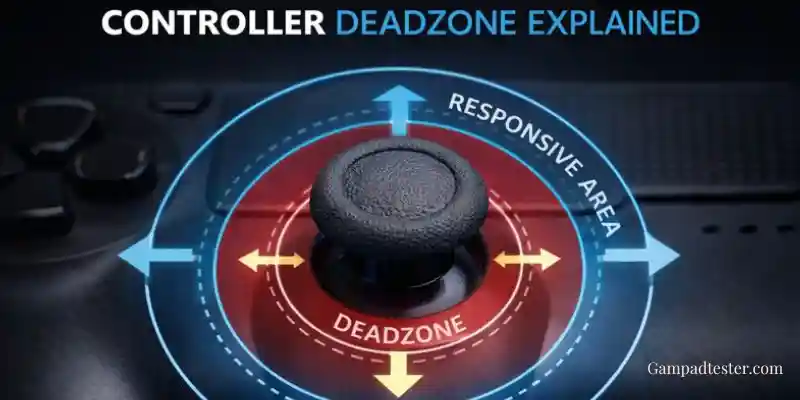
What is a Deadzone, Actually?
A deadzone is a small range around the center of a joystick that games intentionally ignore.
In simple terms:
“Ignore tiny movements so the game doesn’t react to noise.”
If a game has a deadzone of 0.05, that means:
- Any input between -0.05 and 0.05 is treated as zero
- The stick can move slightly without affecting gameplay
This is by design, not a flaw.
My First Real “Aha” Moment With Deadzones
I remember testing a controller that:
- Clearly showed 0.02 at rest
- Looked “off-center” in a tester
But in-game:
- No movement at all
- Perfect control
- No drift symptoms
At first, I thought the tester was exaggerating the problem.
Then I turned off deadzones in a game’s advanced settings — and suddenly:
- The camera started drifting slightly
- That tiny 0.02 suddenly mattered
That’s when it clicked:
Deadzones are the reason many controllers feel fine despite imperfect data.
Why Deadzones Are Necessary (From a Hardware Perspective)
From testing dozens of controllers, I can tell you:
- Analog sticks are never perfectly still
- Sensors fluctuate slightly
- Mechanical parts settle imperfectly
Without deadzones:
- Characters would constantly twitch
- Cameras would drift slightly
- Games would feel unstable
Deadzones exist to make analog hardware usable in the real world.
Typical Deadzone Ranges (What I See Most Often)
Based on experience across many games and platforms:
- Small deadzones: 0.03 – 0.05
- More responsive
- Less forgiving of wear
- Moderate deadzones: 0.05 – 0.10
- Most common
- Masks early drift well
- Large deadzones: 0.10+
- Hides drift
- Reduces precision
Different games choose different values depending on the genre.
Why Online Testers Don’t Apply Deadzones
This is important.
Online testers like Gamepad tester show:
- Raw input
- No filtering
- No deadzones
At first, that can look alarming.
But from a diagnostic standpoint, this is exactly what you want.
Seeing raw input lets you:
- Detect early wear
- Compare controllers accurately
- Understand what the game is masking
If testers applied deadzones, you’d lose valuable information.
Deadzone vs Stick Drift (Key Difference)
Here’s how I separate the two in practice:
- Deadzone:
Input exists, but is intentionally ignored. - Stick drift:
Input exists and causes unwanted movement.
If a value:
- Stays small
- Is stable
- Does not cause in-game movement
That’s deadzone behavior, not drift.
Why Lower Deadzones Feel “More Sensitive”
Many competitive players reduce deadzones.
From experience:
- Lower deadzones feel snappier
- Aim feels more immediate
- Small movements matter more
But the tradeoff is:
- Early drift becomes noticeable
- Controller imperfections show up faster
That’s why older controllers often feel worse with low deadzones.
Why Drift Feels Sudden in Games
This is a pattern I’ve seen repeatedly.
What actually happens:
- Drift slowly increases over time
- Deadzone masks it
- Drift crosses the deadzone threshold
- Suddenly, movement appears
It feels sudden — but the wear was gradual. Online testing lets you see that progression early.
How I Use Deadzones When Diagnosing Controllers
My personal approach:
- Test raw input in a browser
- Observe axis stability
- Compare values to common deadzone ranges
- Decide whether the issue is masked or real
This tells me:
- Whether cleaning might help
- Whether recalibration is worth trying
- Whether replacement is inevitable
Common Deadzone Misunderstandings I See
These cause unnecessary worry:
- “Any movement means drift.”
- “It should always be zero.”
- “The tester is wrong because the game works.”
- “Lower deadzone always means better control.”
Understanding deadzones clears all of these up.
When Deadzone Adjustment Can Help
From experience, adjusting deadzones helps when:
- Drift is very mild
- You want more precision
- The controller is aging but usable
It does not help when:
- Drift is severe
- Values creep constantly
- Inputs fluctuate wildly
Deadzones hide problems — they don’t fix them.
Use Testing + Deadzones Together
The smartest approach is combining both:
- Use a tester to see raw behavior
- Use deadzones to manage gameplay feel
One informs the other.
Test With Context, Not Panic
Seeing a small movement in a tester doesn’t mean your controller is doomed. Use Gampadtester.com
Then compare what you see with real deadzone behavior — that’s how experienced testers make accurate calls.