PS5 Gamepad Analog Stick Replacement Guide
Published: 30 Apr 2026
Analog stick issues on PS5 controllers can significantly affect gameplay accuracy and control. Problems like drifting or unresponsive stick clicks are common after extended use. Fixing these issues requires technical skill and proper tools, as the analog module is soldered directly onto the board. This guide explains the problem, diagnosis, and replacement process step by step.
Note: Replacing an analog stick requires experience and appropriate equipment.
Issue Description
One of the most frequent issues with PS5 controllers is analog stick drift, where the stick registers movement even when untouched. This can cause characters or camera angles to move on their own, making games difficult to play.
Another common problem occurs when pressing the analog stick (L3 or R3) does not register any input. This usually indicates internal wear or failure within the analog module itself, requiring replacement.
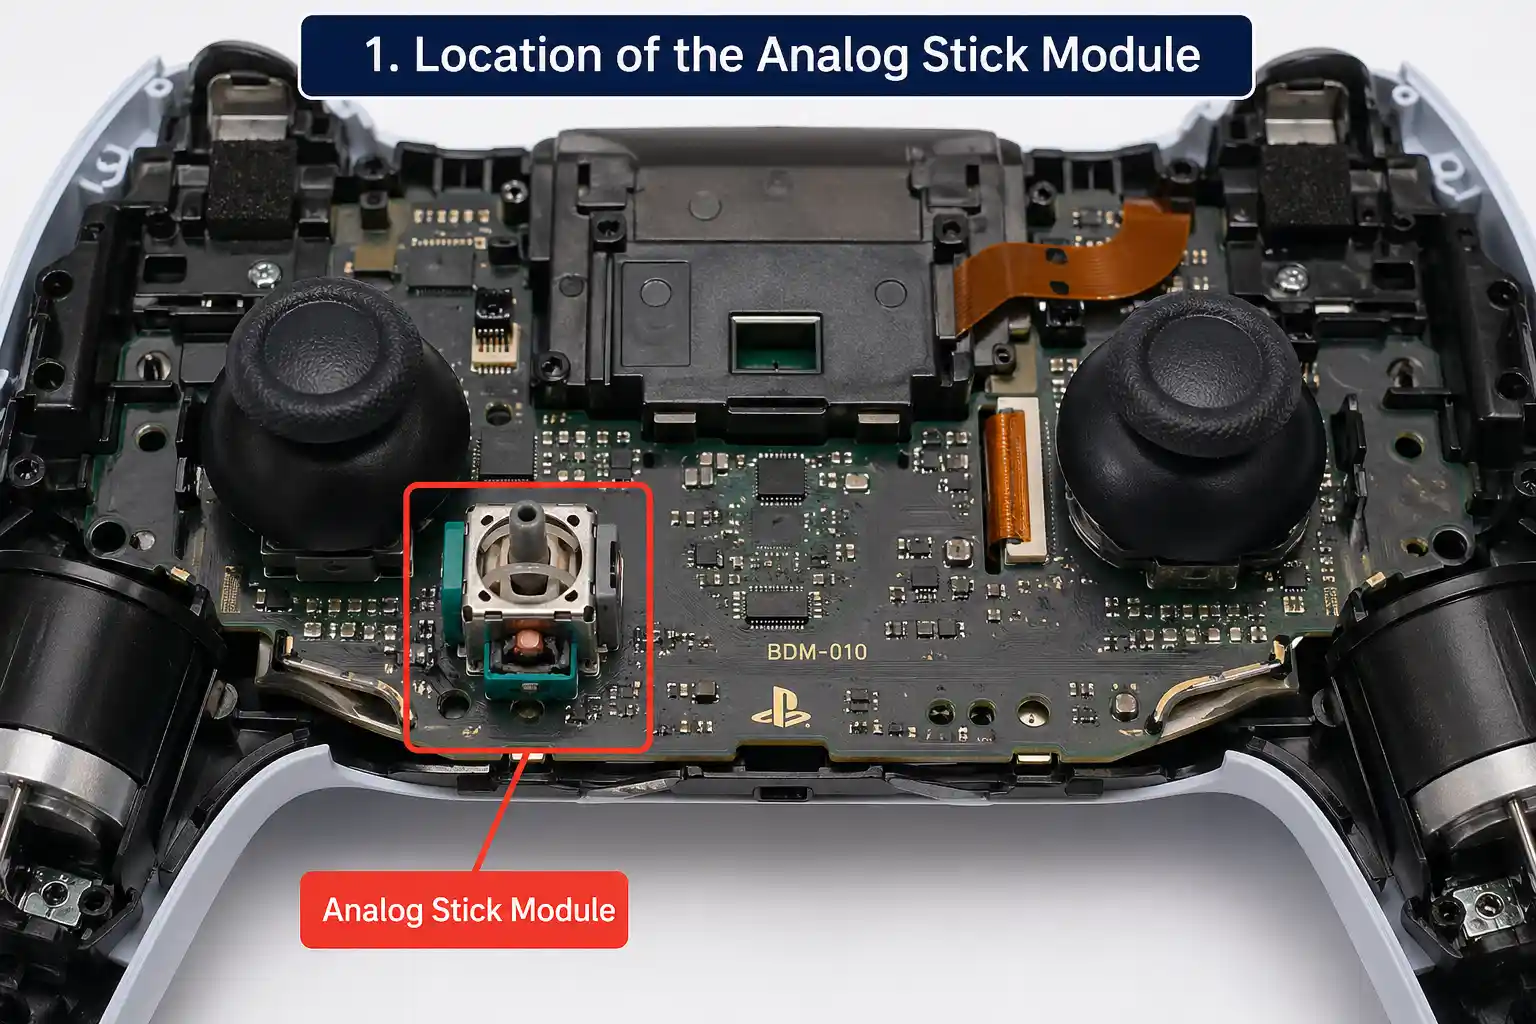
Diagnostics
To confirm the issue, connect your controller to a testing tool and observe the analog stick behavior. If the stick shows movement without input or the tracking path appears unstable or inaccurate, it is a clear sign of a faulty module.
Additionally, test the L3/R3 click functionality. If pressing the stick does not register consistently, the internal switch mechanism is likely damaged.
Repair Steps
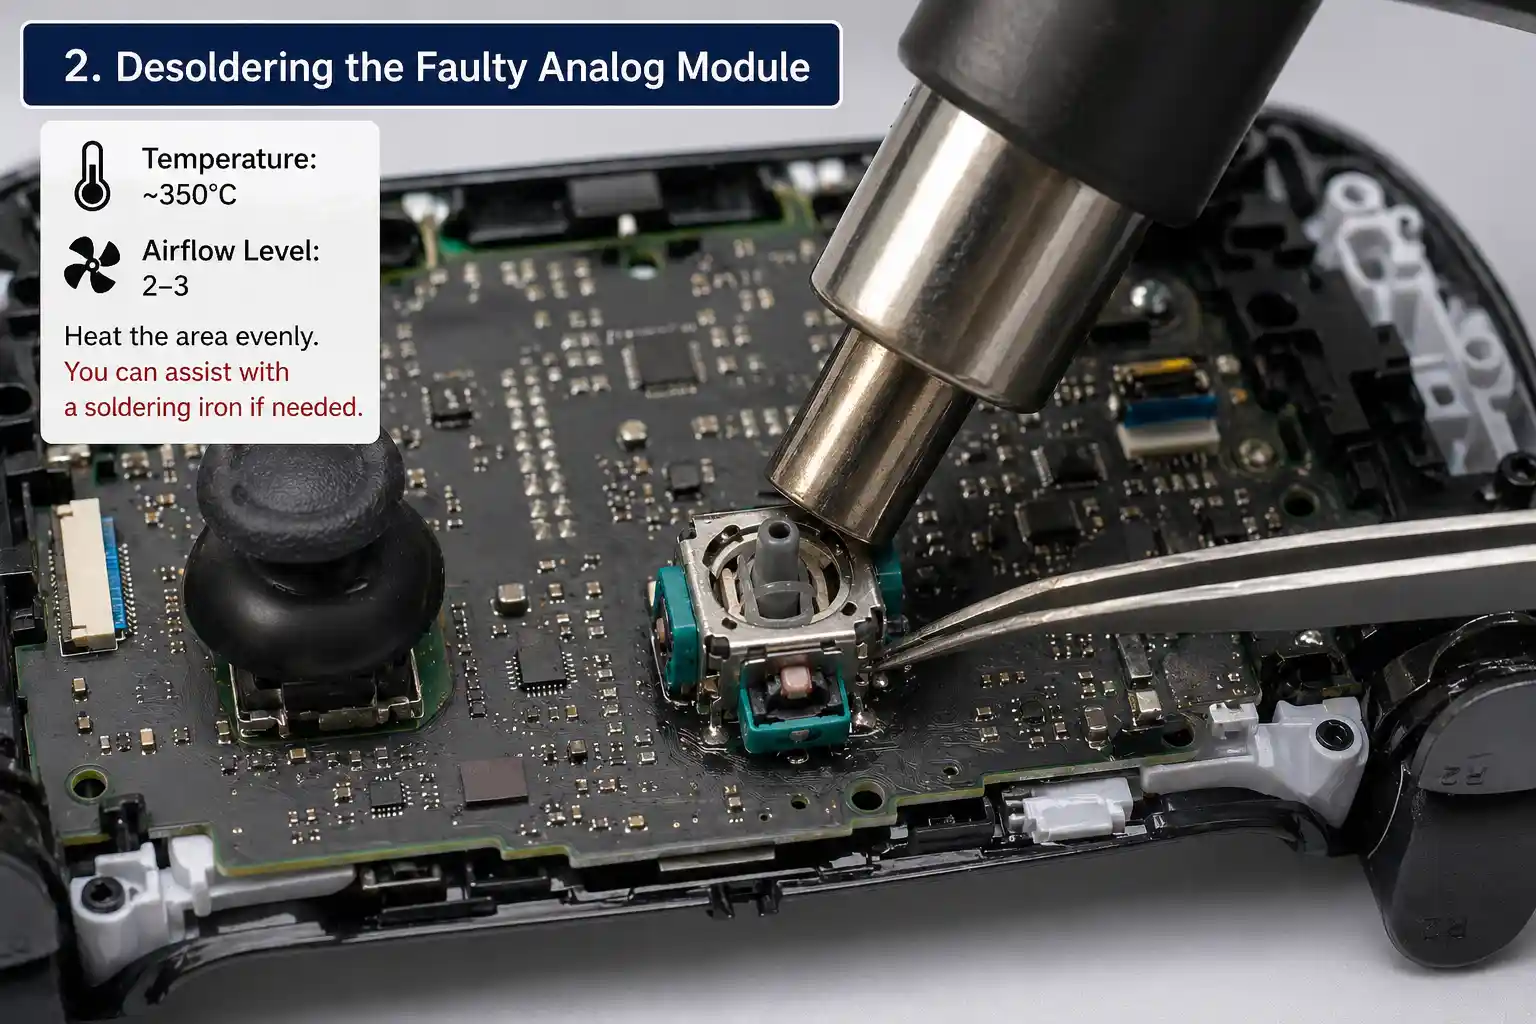

Start by preparing your tools, including flux, solder, a hot air station, and a soldering iron. Apply flux and a small amount of fresh solder to the analog stick joints to improve heat transfer.
Set your hot air station to approximately 350°C with airflow level 2–3. Carefully heat the analog module evenly to loosen the solder. You may use a soldering iron alongside hot air for better control during removal.
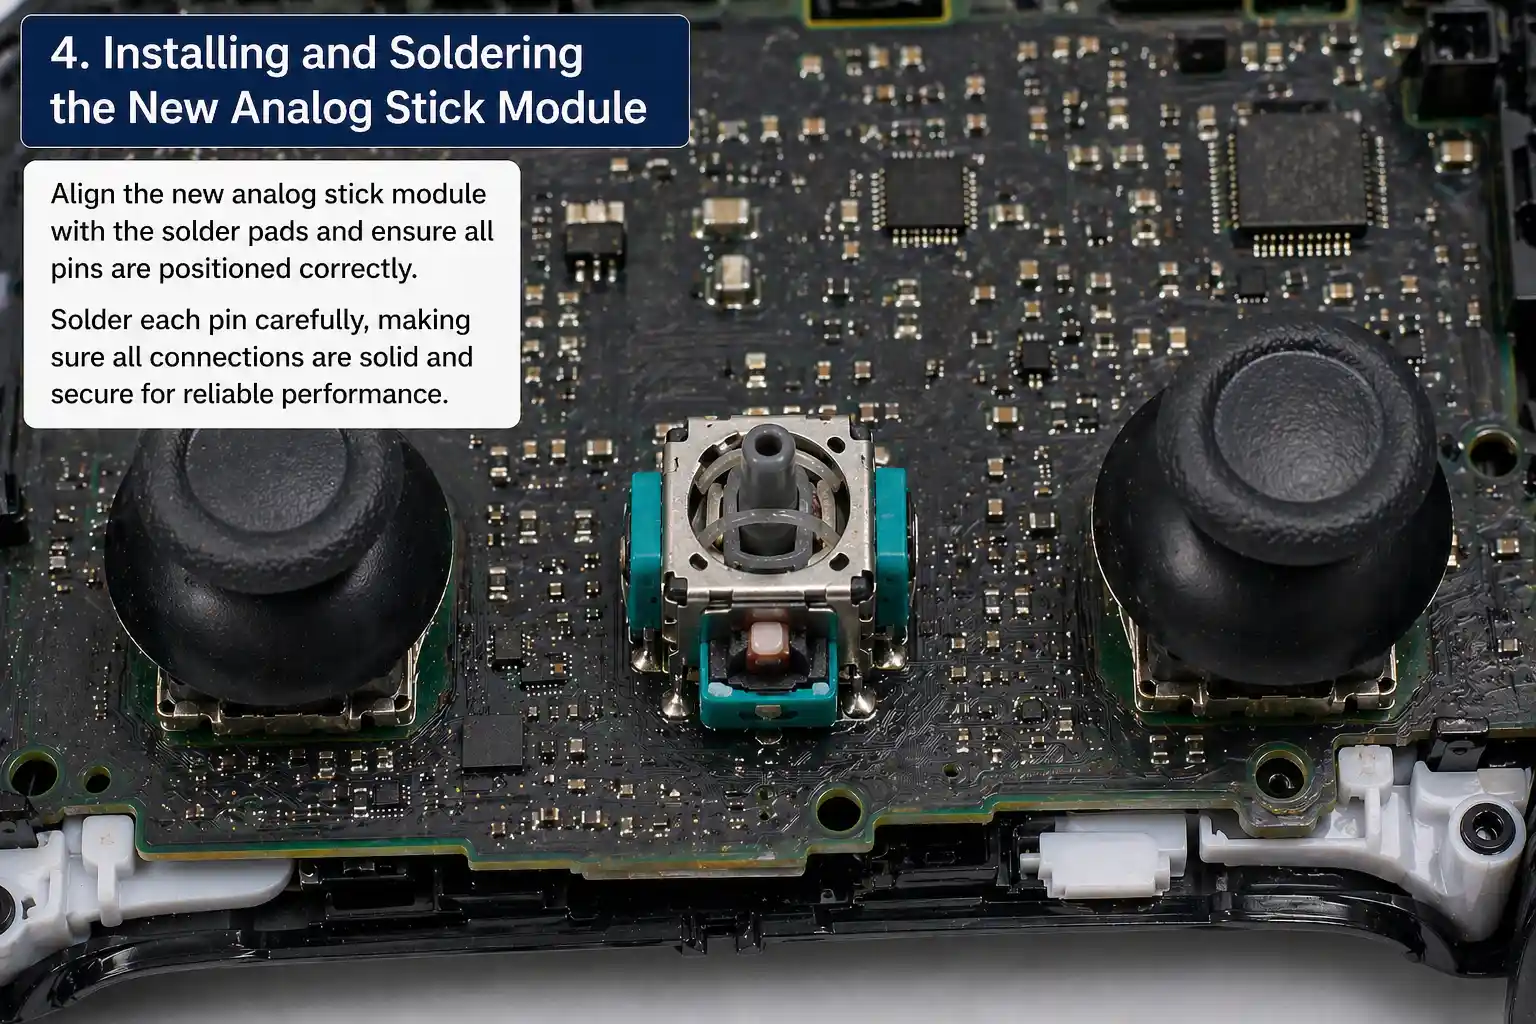
Once the old analog module is detached, clean the solder pads thoroughly to remove any leftover solder or debris. This ensures proper contact for the new component.
Position the replacement analog stick carefully, aligning all pins correctly. Then solder it in place, making sure each connection is secure and properly formed.
Testing
After completing the replacement, test the controller using Gampadtester.com. Check for smooth analog movement, accurate input response, and proper L3/R3 functionality.
- PS5 Gamepad Analog Stick Replacement GuideAnalog stick issues on PS5 controllers can significantly affect gameplay accuracy and control. Problems like drifting or unresponsive stick clicks are common after extended use. Fixing these issues requires technical skill and proper tools, as the analog module is soldered directly onto the board. This guide explains the problem, diagnosis, and replacement process step by… Read more: PS5 Gamepad Analog Stick Replacement Guide
- Xbox Series Gamepad Noisy or Sticky LT and RT TriggersXbox Series controllers are built for precision, but trigger issues can still develop over time. If your LT or RT buttons feel sticky, sluggish, or make an unusual noise, it can disrupt your overall gaming experience. These problems are often caused by worn or dirty internal components. Fortunately, with the right approach, you can fix… Read more: Xbox Series Gamepad Noisy or Sticky LT and RT Triggers
- Xbox One Controller Drift After New Analog Stick Replacement: Full Repair GuideStick drift can be especially confusing when it appears after fitting a new analog module. In many Xbox One controllers, this happens because the replacement part does not match the original electrical values closely enough. Even a small difference in resistance can make the controller read movement while the stick is resting in the center.… Read more: Xbox One Controller Drift After New Analog Stick Replacement: Full Repair Guide
- Xbox Series Gamepad Drift Fix: Analog Replacement And Manual Resistance Adjustment GuideStick drift is one of the most common issues affecting Xbox Series controllers, and it can become even more frustrating when it appears after installing a brand-new analog stick. Many users assume that replacing the analog module will completely solve the problem. However, in reality, slight variations in the electrical characteristics of the new components… Read more: Xbox Series Gamepad Drift Fix: Analog Replacement And Manual Resistance Adjustment Guide
- PS5 Edge Gamepad Analog Replacement and Calibration Guide: HALLA, TMR, and Original SticksReplacing the analog stick on a PS5 DualSense Edge controller is not a simple beginner repair. The motherboard pads are delicate, the analog module requires careful soldering, and calibration needs an extra wire connection to save the correct data inside the controller. This guide explains the key steps for replacing and calibrating HALLA, TMR, or… Read more: PS5 Edge Gamepad Analog Replacement and Calibration Guide: HALLA, TMR, and Original Sticks


- Be Respectful
- Stay Relevant
- Stay Positive
- True Feedback
- Encourage Discussion
- Avoid Spamming
- No Fake News
- Don't Copy-Paste
- No Personal Attacks
- Be Respectful
- Stay Relevant
- Stay Positive
- True Feedback
- Encourage Discussion
- Avoid Spamming
- No Fake News
- Don't Copy-Paste
- No Personal Attacks
